Clay Masterson, Backcountry Conditioning Expert & Gear Pragmatist
June 23, 2026 · 17 min read
Compare Public Gym Machines for Low-Impact Workouts
Most bad outdoor workouts fail before the first rep. Not because the athlete is weak. Because the station is wrong for the job.
If you want to know how to check compare public gym machines for low-impact workouts, start with one hard truth: “outdoor fitness equipment” is not one category. Some machines protect your knees and let you build steady work capacity. Some torque your joints through ugly paths. Some are sturdy, low-friction tools. Some are sun-baked scrap metal pretending to be training equipment.
I like park gyms. I use them. I program around them. But I do not trust them blindly. Public equipment sits in rain, heat, freeze-thaw cycles, dog leash traffic, bored teenagers, bad installation jobs, and municipal maintenance schedules that may or may not exist in any useful form. You need a field eye. Not paranoia. Inspection.
For related context, see Compare Two Habit Stacking Methods: My 4-Week Test.
For related context, see Fitness experts promote structured 'train smart' approach.
Low-impact training is not soft training. It is joint-smart training. It keeps ground reaction forces low, manages load distribution, and lets you build engine, tissue tolerance, and repeatable movement without shredding your knees for the privilege of feeling tough.
Start with biomechanical safety, not the paint job
The outdoor industry loves bright powder coat and big instruction stickers. Fine. Paint keeps steel alive. Stickers help beginners. But neither tells you whether the machine respects your body mechanics.
Biomechanical safety means the machine lets your joints move through a sane path under a sane load. Ankles, knees, hips, spine, shoulders, elbows, wrists — the whole kinetic chain has to cooperate. If one joint gets pinned while another joint is forced to rotate, you get torque in the wrong place. That is where “easy park workout” turns into a cranky knee or hot shoulder.
In Europe, permanently installed outdoor fitness equipment often falls under EN 16630:2015. That standard lays out safety requirements and test methods for outdoor fitness stations. It does not magically make every public gym good. It does give you a frame: equipment should be designed, installed, and tested with actual use and foreseeable abuse in mind.
You are not going to carry a standards manual to the park. Good. You do not need to. You need to look for what the standard is trying to prevent: traps, unstable movement, bad clearances, sharp edges, uncontrolled loading, and equipment that fails under normal public use.
Here is the quick field read:
- Joint path: Does the machine guide your limbs through a clean arc, or does it yank you into a weird angle?
- Entry and exit: Can you get on and off without twisting, hopping, or catching a foot?
- Stop points: Does the movement have controlled limits, or can it slam into the end range?
- Contact points: Are handles, pedals, seats, and backrests stable and positioned for different body sizes?
- Surface and spacing: Is there room to move without clipping another station, curb, bench, or runner drifting through?
- Hardware condition: Bolts, welds, pivots, bearings, grips. These decide whether the machine earns your body weight.
Low-impact does not mean low-standard. If the machine makes your joints negotiate with bad metal, walk away.
The first rep should feel boring. That is a compliment. Boring means predictable. Predictable means you can build volume. Volume is where low-impact work pays rent.
Resistance type: hydraulics, body-weight leverage, and the lie of “one size fits all”
Outdoor gym machines usually use one of two resistance styles: hydraulic cylinders or body-weight leverage. Some stations are basically movement guides with little meaningful resistance. That is not always bad. It depends on the goal.
Hydraulic resistance uses a cylinder to create drag. Push or pull, and the cylinder fights back. Good versions feel smooth and steady. Bad versions feel sticky, jerky, or dead in one direction. Hydraulic stations can be useful for low-impact strength endurance because they reduce the need for jumping, dropping, or heavy external loading.
Body-weight leverage systems use your own mass as the load. Think assisted squat machines, chest press stations, row stations, dip variations, and sit-to-stand patterns where the machine changes the lever arm. Calisthenics-based stations can range from near-zero resistance to full body weight. In practical terms, that means roughly 0–100% of your body weight depending on the setup and how much of you the machine is asking you to move.
Do not confuse body-weight training with automatic joint safety. A poorly aligned body-weight press can grind a shoulder just as well as a bad bench press. A leverage leg press with a seat angle built for nobody in particular can make your knees track like shopping cart wheels.
| Parameter | Hydraulic machines | Body-weight leverage stations |
|---|---|---|
| Resistance feel | Usually smooth drag if maintained; can get sticky when worn | Load changes with body position, lever length, and user weight |
| Adjustability | Often limited; sometimes speed-dependent rather than plate-adjusted | Usually limited; your body weight is the main load |
| Low-impact value | Strong for controlled push-pull and steady conditioning | Strong if joint path is clean and range is manageable |
| Failure point | Leaking, jerky, or uneven cylinders | Bad pivots, awkward angles, too much load too soon |
| Best use | Strength endurance, warm-ups, rehab-adjacent general conditioning with caution | Functional strength, controlled reps, outdoor circuits |
| Main warning | Do not force through sticky resistance | Do not assume “body weight” means beginner-friendly |
Hydraulic machines can be sneaky. If the cylinder is shot, the movement may collapse fast near the end range. That sudden unload can make you brace late. Shoulders hate that. Knees hate that. Spines hate that.
Body-weight stations can be honest but unforgiving. A pull-up bar tells the truth. A dip station tells the truth. A leverage press sometimes lies by making the first half of the rep easy and the second half ugly. Test with partial range first. Slow. Controlled. No ego reps.
If you want a clean way to compare machines, use a three-rep test:
1. First rep: map the path. Move through half range with almost no force. Feel the arc. Watch where your knees, elbows, and wrists want to go.
2. Second rep: check the load curve. Move through full range slowly. Notice whether resistance spikes, drops, sticks, or slams.
3. Third rep: check repeatability. Do one normal rep. If your body has to improvise a new strategy each time, the machine is not stable enough for volume.
This is how I sort useful equipment from public-park decoration. No drama. No lab coat. Just reps with attention.
The actual low-impact machines worth your time
Low-impact means minimal joint loading compared with high-impact work like bounding, sprinting, or repeated plyometrics. That does not mean no stress. Your tissues need stress. They just need the right dose and direction.
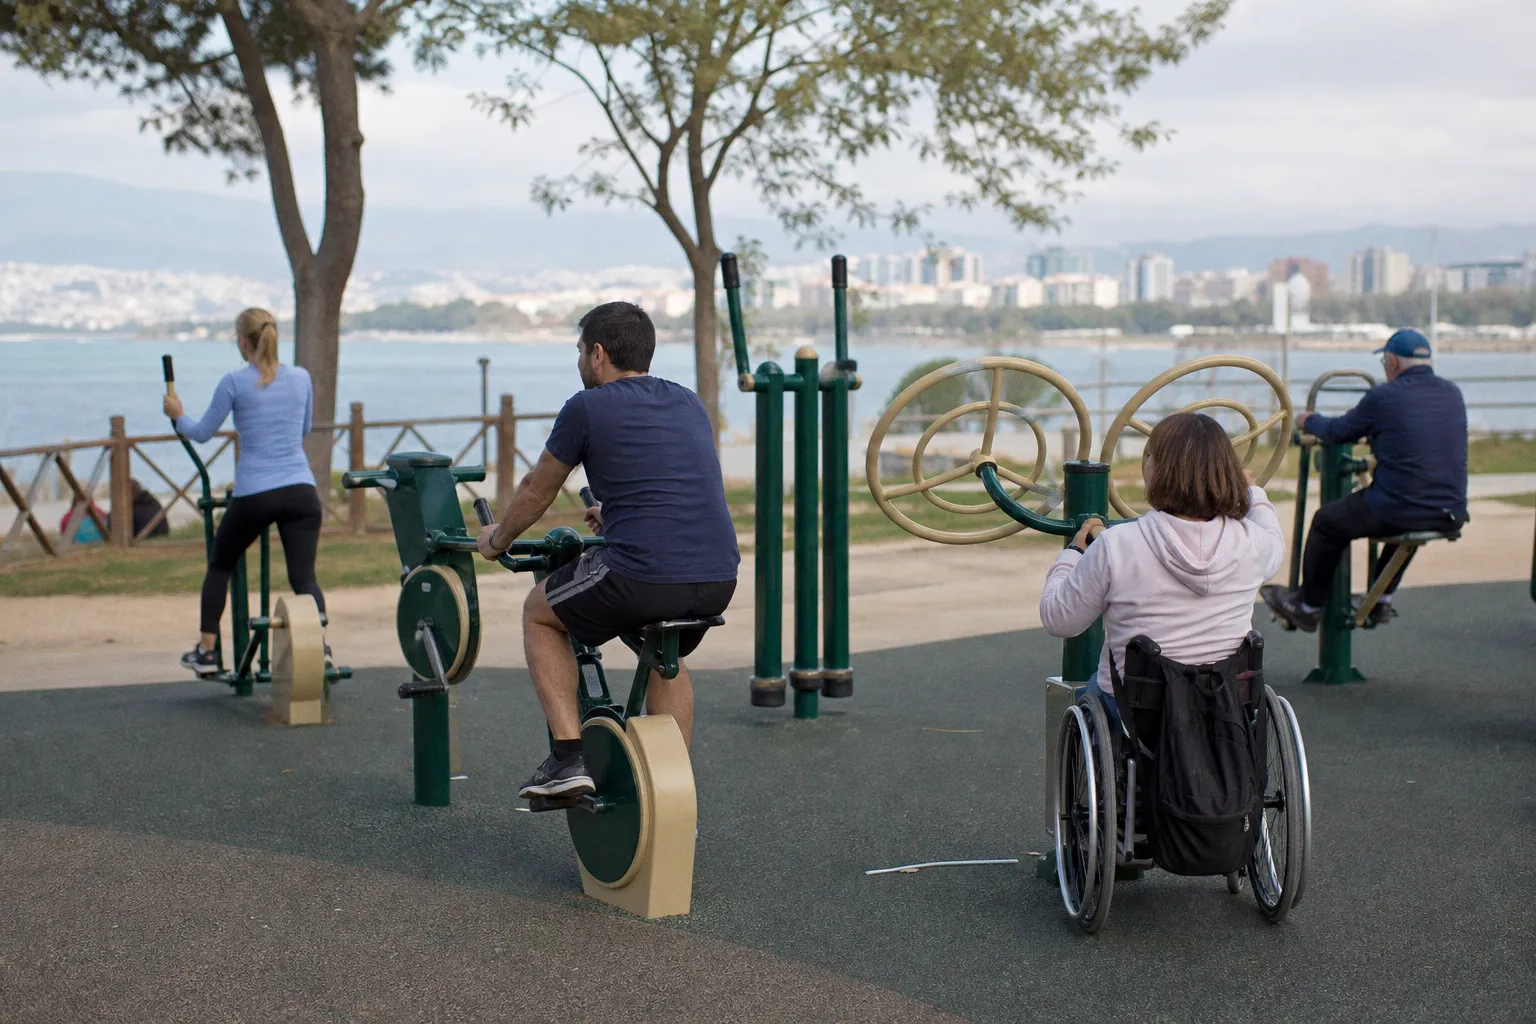
The best low-impact public gym machines usually keep at least one foot supported, reduce landing forces, or guide the body through a smoother repeated pattern. Elliptical-style trainers, stationary cycles, tai chi wheels, seated presses, seated rows, and some stepper-style machines can all fit the bill if they are built and maintained well.
Elliptical cross-trainer
A park elliptical can be useful for warm-ups, easy aerobic work, and knee-friendly conditioning. Your feet stay on the pedals. That reduces impact compared with running. The problem is stride geometry.
A bad outdoor elliptical has a short, choppy path that makes your hips bob and your knees punch forward. A good one lets you settle into a repeatable cadence without hip hiking or ankle jamming.
Check these points:
- Pedals should track evenly without wobble.
- Handles should not force your shoulders into shrug position.
- The stride should feel smooth, not like pedaling a broken shopping cart.
- Your knees should track forward, not dive inward.
- You should be able to hold a steady cadence without bracing your lower back.
Use it for 5–15 minutes of aerobic work, warm-up, or recovery. Do not pretend it replaces hill climbing. It does not. It is a tool, not a mountain.
Stationary cycle
The outdoor stationary bike is one of the better low-impact options when the seat position is not absurd. Cycling keeps ground impact low and lets you build heart and legs without pounding.
But many public cycles are fixed-height or barely adjustable. That matters. If the seat is too low, your knees stay compressed and your quads burn in a cramped range. If it is too high, your hips rock and your lower back starts paying the bill.
Your knee should keep a slight bend at the bottom of the pedal stroke. Not locked. Not folded. If the machine cannot get you anywhere close, skip it or use it briefly as a warm-up.
Tai chi wheels and shoulder mobility stations
Tai chi wheels look gentle. They can be. They can also expose stiff shoulders fast.
These stations use large circular wheels moved by the hands. The goal is controlled shoulder motion, upper-body circulation, and coordination. Low impact, yes. Low risk? Only if you respect range.
Do not crank the wheel into your end range and call it mobility. That is just irritation with better branding. Keep ribs down. Neck relaxed. Move from the shoulder blade and shoulder joint together. If you feel pinching in the front of the shoulder, reduce range or stop.
Seated row and chest press
These are useful when the handles line up with your frame. The seated row should let you pull without flaring the ribs or wrenching the wrists. The chest press should let your elbows move slightly below shoulder height, not jammed high like you are trying to shove a stuck garage door.
Hydraulic versions are common. Smooth resistance is the whole game. If one side drags harder than the other, your torso will rotate to cheat. That turns a simple press or row into a crooked spine drill. Hard pass.
Low stepper or air walker
Steppers vary wildly. Some are smooth. Some are knee grinders. Air walkers can be fine for gentle hip motion and light cardio, but many have almost no resistance. That is okay if the goal is circulation, warm-up, or movement snacks during a walk. It is not okay if you think you are building serious leg strength.
The low-impact question is simple: can you move rhythmically without joint noise, wobble, or bracing? If yes, use it. If no, leave it alone.
Compare machines by what they do to your kinetic chain
The wrong way to compare public machines is by muscle label. “Chest.” “Legs.” “Cardio.” Those labels are kindergarten-level programming.
Compare by what the machine asks your kinetic chain to manage.
Does it ask for pushing, pulling, hinging, stepping, rotating, or cycling? Does it stabilize you, or force you to stabilize yourself? Does it load both sides evenly? Does it let you control cadence? Does it punish long femurs, short arms, stiff ankles, or limited shoulder flexion?
Here is the practical comparison grid I use when I am building a low-impact circuit in a park gym.
| Machine type | Primary training value | Low-impact score | What to inspect first | Best programming slot |
|---|---|---|---|---|
| Stationary cycle | Aerobic base, warm-up, knee-friendly leg work | High | Seat height, pedal smoothness, crank wobble | 5–20 minute steady effort |
| Elliptical cross-trainer | Low-impact cardio, full-body rhythm | High | Stride path, handle height, pedal stability | Warm-up or aerobic intervals |
| Tai chi wheels | Shoulder mobility, coordination, circulation | High if range is controlled | Wheel smoothness, shoulder comfort, grip security | Warm-up, cooldown, mobility block |
| Seated row | Upper-back endurance, posture strength | Medium-high | Handle alignment, cylinder smoothness, seat stability | Strength endurance circuit |
| Seated chest press | Upper-body push endurance | Medium-high | Elbow path, shoulder position, resistance symmetry | Push-pull circuit |
| Stepper | Cardio, local leg endurance | Medium | Knee tracking, step depth, platform grip | Short intervals if smooth |
| Dip station | Upper-body strength | Low to medium depending on user | Shoulder depth, grip width, body control | Only if strong and pain-free |
| Pull-up bar | Strength, grip, trunk tension | Joint impact low, tissue demand high | Bar height, grip condition, landing surface | Strength skill, not casual volume |
Notice the dip and pull-up bar. They are technically low-impact because you are not smashing into the ground every rep. But they are not automatically joint-friendly. Tissue demand is high. Shoulders, elbows, wrists, and grip all take real load. If you are not prepared, they will find your weak link and pry it open.
That is the difference between impact and stress. Impact is one kind of stress. Not the only kind.
A machine can be low-impact and still be too much load. Your joints do not care what the sign says.
Inclusive design is not a bonus feature
A good public fitness space should not only serve the already-fit guy who can jump onto anything and muscle through bad geometry. Inclusive design matters. That means stations that allow different body sizes, mobility levels, and entry strategies to train without circus tricks.
Look for seated operation. Look for wheelchair-accessible stations. Look for open transfer space. Look for handles that can be reached without folding the spine into a question mark. Look for pedals, grips, and seats that do not assume one perfect user.
This is not charity language. It is good equipment logic. If a station works for a wider range of bodies, it is usually better designed. Cleaner access. Better clearances. More controlled movement. Less nonsense.
For athletes, inclusive design has another benefit: it gives you options on beat-up days. After a long trail run, a heavy pack carry, or a downhill session that cooked your quads, you may not need heroic training. You may need circulation, range, and light muscular work. Seated and accessible stations let you keep moving while dropping orthopedic cost.
And yes, education matters here too. People use public equipment better when they understand movement, progression, and basic body mechanics. I like seeing communities treat outdoor fitness spaces as learning environments, not just metal playgrounds; that broader culture of skill-building is why resources around education and training preparation are relevant even outside the classroom.
The point is simple: the best outdoor gyms teach better movement by design. The worst ones dare you to compensate.
My field inspection before I put a client on a station
I do not care how new the park looks. I inspect first. Every time.
Public machines live hard lives. Rain gets into pivots. UV cooks grips. Sand works into bearings. Bolts loosen. Paint hides rust until it does not. A machine can look fine from ten feet away and feel like a lawsuit once you load it.
Use this sequence before training. It takes less than two minutes once you build the habit.
1. Walk the base. Check the mounting points. If the frame shifts, rocks, or lifts when you push it, do not use it. Outdoor equipment should feel anchored. Not “probably okay.” Anchored.
2. Scan for sharp edges and exposed hardware. Look at hand contact points, seat edges, pedal rims, and adjustment areas. Torn grips and jagged metal will shred skin fast, especially when sweat gets involved.
3. Move it unloaded. Push the handles. Cycle the pedals. Rotate the wheels. Listen for grinding, clunking, scraping, or uneven resistance. Noise is not always danger, but it is information. Respect it.
4. Check symmetry. On bilateral machines, both sides should move evenly. If the left handle drags and the right handle floats, your body will twist under load.
5. Test the end range. Do not slam it. Ease into the limit. A controlled stop is fine. A violent metal-on-metal crash is not.
6. Check the ground. Wet rubber, loose gravel, mud, roots, and broken surfacing change everything. Low-impact training gets stupid when the entry step is a slip hazard.
7. Do one light set before the work set. Your first set is reconnaissance. If the machine passes, then train. If it fails, adapt.
This is where I get demanding: stop outsourcing judgment to the city, the manufacturer, or the instruction placard. Your knees are yours. Your shoulders are yours. Inspect the tool before you feed it reps.
How to build a low-impact outdoor machine circuit that does not waste your time
A good low-impact circuit has rhythm. It alternates stress. It does not just bounce randomly from one station to the next because the park put them in a circle.
You want a mix of cardio, push, pull, lower-body patterning, and mobility. Keep cadence clean. Keep range controlled. Leave a little in the tank unless the session is specifically designed to bite.
Here is a simple structure I use when the equipment checks out:
Warm-up: 6–8 minutes
Start with either the stationary cycle, elliptical, or air walker. Keep it easy. Nasal breathing if you can. Smooth cadence. You are raising tissue temperature and checking how the joints feel today.
Then hit tai chi wheels or shoulder mobility for 1–2 minutes. Controlled circles. No cranking. No rib flare.
Main circuit: 3–5 rounds
- Elliptical or cycle: 2 minutes at moderate effort. You should be working, not gasping.
- Seated row: 10–15 controlled reps. Pause briefly at the back. No torso yank.
- Seated chest press: 8–12 reps. Wrists stacked. Shoulders down. Smooth return.
- Stepper or supported squat station: 8–12 reps or 45 seconds. Knees track clean.
- Mobility station or easy walk: 60 seconds to reset breathing and posture.
Rest as needed. That phrase gets abused, so I will sharpen it: rest long enough that your next round is technically clean. Not long enough to scroll yourself cold.
Cooldown: 4–6 minutes
Easy cycle, walk, or air walker. Then shoulder wheels or gentle trunk rotation if available. Leave better than you arrived. That is not softness. That is training maturity.
For older athletes, heavier athletes, runners managing cranky knees, or hikers coming off high-mileage weeks, this kind of circuit can build useful work capacity without adding more pounding. For strong athletes, it can serve as recovery conditioning or a joint-friendly aerobic add-on after strength work.
What it will not do: replace progressive heavy strength training. Public machines usually do not offer the same resistance adjustability as high-end indoor selectorized machines. Do not pretend otherwise. Use the park gym for what it does well: accessible, repeatable, low-impact movement under moderate load.
Red flags that end the session
Some machines are not worth negotiating with. If you see these, move on.
- Visible frame movement under light force. If the station rocks before you even train, it has no business carrying your effort.
- Jerky hydraulic resistance. Sticky cylinders create surprise loading. Surprise loading is where joints get ambushed.
- Painful fixed positions. If the seat, handles, or pedals force you into pain immediately, your body is not the problem. The fit is.
- Grinding pivots. Friction changes the load curve and may signal deeper wear.
- Slippery foot plates. Low-impact does not help if your foot skates mid-rep.
- Missing grips or cracked surfaces. Small damage becomes big damage under sweat and repetition.
- No safe exit. If you cannot get off the machine cleanly when tired, do not get on it fresh.
There is no prize for salvaging a bad station. I have trained with rocks, logs, packs, benches, hills, and empty trailheads. You can find another movement.
The honest way to compare public gym machines
When someone asks me how to check compare public gym machines for low-impact workouts outdoor fitness style, I give them the same answer: compare movement quality before intensity.
A useful machine gives you controlled range, stable contact, smooth resistance, clean joint tracking, and a safe exit. A bad machine asks you to solve its design flaws with your connective tissue. That is a dumb trade.
Use standards like EN 16630:2015 as background, not a security blanket. Understand resistance types. Hydraulics are not magic. Body-weight leverage is not automatically safe. Low-impact cardio machines are not automatically effective. Inclusive stations are not side pieces; they are often the best-designed equipment in the park.
The work still belongs to you. Inspect. Test. Adjust. Then train with intent.
Public outdoor gyms can be excellent. They can also be junk with a nice sign. Your job is to know the difference before the first hard rep.